
Waist trainers have become increasingly popular over the past few years, especially among fitness enthusiasts and those looking for an extra boost of confidence. Whether you're wearing one to accentuate your curves, support your back, or help with posture, knowing how to put on a waist trainer properly is key to ensuring safety, comfort, and effectiveness.
In this detailed guide, we'll walk you through everything you need to know—from choosing the right waist trainer to putting it on step-by-step. Let's dive in!
Why It's Important to Wear Your Waist Trainer Correctly
Before we get into the "how," let's talk about the "why." Wearing a waist trainer incorrectly can not only make it uncomfortable but can also reduce its effectiveness—or worse, cause harm to your body.
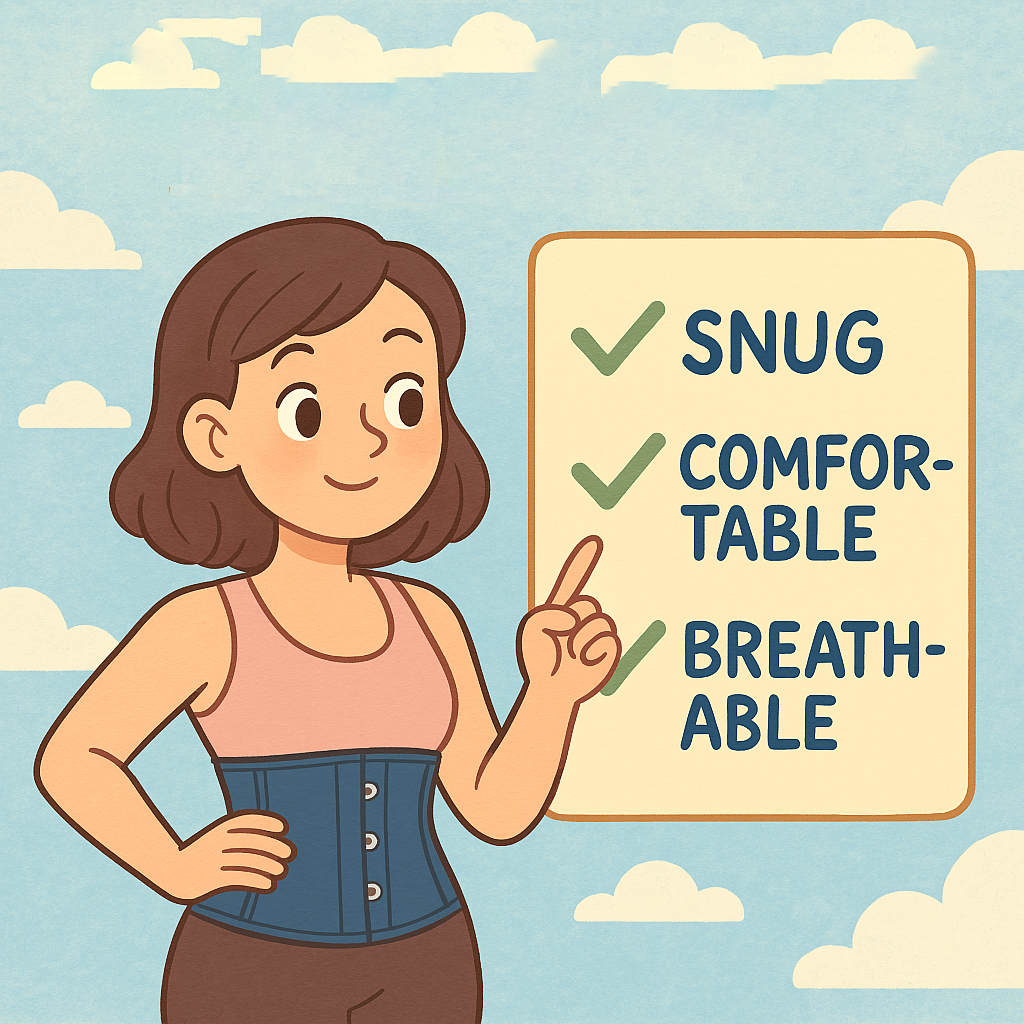
A well-fitted waist trainer should:
- Feel snug, but not painful
- Support your midsection without restricting breathing
- Help improve posture, not distort it
Whether you're a beginner or someone revisiting waist training after a break, the way you put it on matters just as much as the waist trainer itself.
Step 1: Choose the Right Waist Trainer
Pick the Right Style
There are several types of waist trainers, and choosing the right one depends on your goals and body type. The three most common types are:
- Hook-and-eye closure (most common): Easy to adjust as your waist size decreases.
- Zipper style: Offers a more secure fit and sleek appearance under clothes.
- Lace-up corsets: Allow the most customization but can be more complex to put on.
For beginners, hook-and-eye waist trainers are generally the easiest to start with.
Choose the Right Size
Don't be tempted to go a size down for "extra" results. A waist trainer that's too tight can cause discomfort, restrict breathing, and even damage internal organs if worn too long.
How to measure your waist:
- Stand up straight and relax.
- Use a measuring tape to wrap around your natural waist—just above your belly button and below your rib cage.
- Make sure the tape is snug but not tight.
- Compare your measurement to the sizing chart provided by the waist trainer brand.
If you're between sizes, it's often best to go up a size for comfort.
Step 2: Preparing to Put On Your Waist Trainer
Wear a Thin Undergarment
It's best to wear a thin tank top or camisole underneath your waist trainer to prevent chafing and absorb sweat. This layer acts as a barrier between your skin and the trainer, making it more comfortable.
Make Sure Your Body Is Dry
Avoid applying lotions, oils, or powders around your waist just before putting on the trainer, as it can cause slippage or irritation.
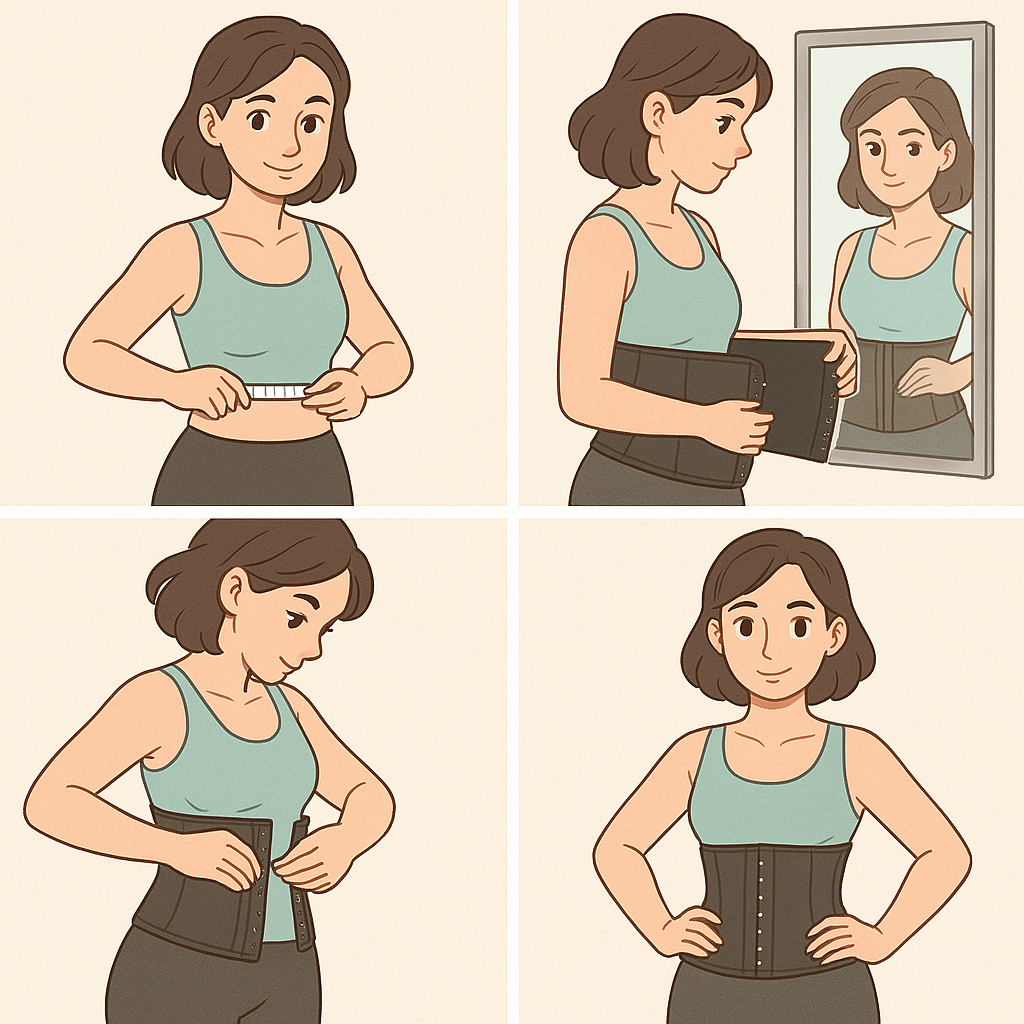
Step 3: How to Put It On (Step-by-Step)
Now, let's get to the good part. Putting on a waist trainer can feel tricky at first, but it gets easier with practice.
For Hook-and-Eye Waist Trainers
- Stand in front of a mirror. It helps to see what you're doing.
- Start fastening from the bottom hook and work your way up. This gives you more leverage as you move toward your rib cage.
- Pull the waist trainer around your midsection, keeping it aligned with your torso.
- Use both hands to guide and fasten the hooks, adjusting as needed to keep it centered.
- Once all hooks are fastened, adjust the position to ensure it's aligned with your waist and hips.
Tip: If you're struggling to fasten the hooks, try lying down on a flat surface to reduce tension on your core.
For Zipper Waist Trainers
- Align the zipper track at the front.
- Start zipping from the bottom while holding the fabric together firmly.
- Make sure the zipper is smooth and doesn't pinch the skin.
- Some zipper trainers come with inner hooks for extra security—fasten those first.
For Lace-Up Corsets
- Loosen the laces enough so that the corset wraps around your body.
- Place the corset around your waist, fastening the busk (front hooks) first.
- Gradually tighten the laces from top and bottom toward the center.
- Tie the laces in the middle, making sure it feels snug but not painful.
Step 4: Final Adjustments and Fit Check
Once the waist trainer is on:
- Check your posture: You should be standing upright with your shoulders back.
- Do a breathing check: Take a deep breath. If it feels too restrictive, loosen it slightly.
- Smooth out wrinkles: Ensure the waist trainer lies flat without rolling or bulging.
- Look for gapping: The trainer should lie flush against your torso without spaces.
Remember, you might feel some pressure (that's the point!), but you should never feel pain.
Common Mistakes to Avoid
- Wearing the Wrong Size: Too small = discomfort; too big = no results.
- Skipping the Undergarment Layer: This can cause skin irritation and shorten the lifespan of the trainer.
- Wearing It Immediately After Eating: Always wait 30–60 minutes after a meal.
- Wearing It for Too Long at First: Ease into waist training gradually (start with 1–2 hours per day).
- Sleeping in It: Unless specifically designed for overnight wear, it's best to remove it before bed.
Tips for First-Time Waist Trainer Users
- Start Slow: Wear your waist trainer for 1–2 hours a day for the first week. Increase gradually.
- Stay Hydrated: Waist trainers can increase sweating. Drink more water to stay hydrated.
- Listen to Your Body: If you feel light-headed, short of breath, or in pain, remove it immediately.
- Combine with a Healthy Lifestyle: Waist training is a supplement—not a substitute—for exercise and a balanced diet.
Conclusion
Wearing a waist trainer properly is all about balance—between snugness and comfort, between structure and flexibility. When used correctly, a waist trainer can help you feel more confident, improve posture, and even support your fitness journey. But the key is knowing how to put it on the right way and listening to your body every step of the way.
So take your time, choose the right size, follow the steps, and enjoy the journey. Your waist trainer is a tool—not a miracle—but with consistency, it can definitely help you shape your goals.
Leave a comment
All comments are moderated before being published.
This site is protected by hCaptcha and the hCaptcha Privacy Policy and Terms of Service apply.